Sydney Tower Eye

KB's friend recommended that we buy the attraction ticket online before we fly to Sydney, we bought the combo pass for 5 attractions online for AUD 63. If you were to buy the tickets over the counter, the combo would cost AUD 99... buy them individually online would be AUD 170 and buy them individually over the counter would be AUD 189! The combo pass can be bought at any of the 5 attraction's website. Anyway, I chose to buy from Sydney Tower Eye beside it is next to our hotel and I'm pretty sure that we'll go there on our first evening at Sydney.

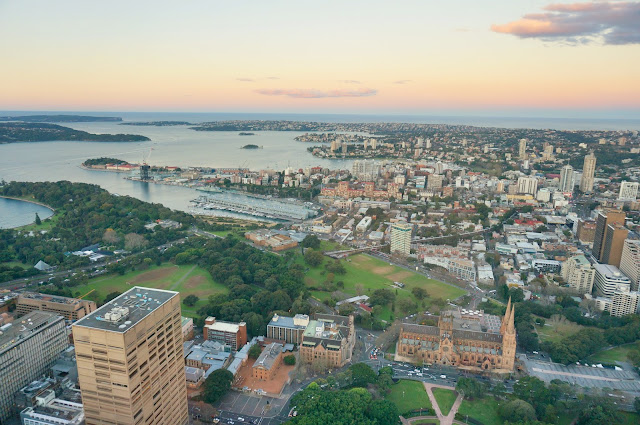
Greedy me wants to see both the day and night view, so I checked the sunset time and made sure we get there slightly before that time. After the official sunset time, we had to wait for more than 40 minutes for the sky to go totally dark.


Looking east


Looking south


Looking west


Street lights lighted up


Looking north

Trick Eye Museum

I went to the Trick Eye Museum with a few of my colleagues this afternoon! We heard about the crazy long queue when it first open, because of the 50% discounted tickets during the opening season. We have missed that discount and picked a weekday afternoon (and took leave) to go.


This is the actual upright view of this art piece. The red "floor" of the painting is actually the wall. One can lie on the floor with the head on the right, legs on the left and the hands stretching up. Take a photo, rotate the photo 90 degrees clockwise and you look as though you are doing a handstand.


Would you like a ride on the Merlion?


Or maybe you'd like to fly around the town on a broom? The broom appears to be floating in mid air, but it is drilled to the wall. I angled this shot to hide the metal support between the broom and the wall.


In January, KB and I went to Korea and visited the Bucket List 3D Art in Jeju. The one that we went to in Jeju has a collection of 2D paintings on walls and floors that look 3-dimensional. However, this collection we visited today has many art pieces that consist of physical objects. These objects are not part of the 2D paintings on the wall; they are actual objects. The art pieces are mostly different in Jeju and in Singapore.

As mentioned by Little Day Out, the art pieces are really close to each other. On top of this, there are so many people in the museum, making it difficult to take photos and people often bump into another each other. Initially, I was thinking of bring along a tripod so that we could take group photo. In the end, I forgot about it this morning. Anyway, it wouldn't be useful... someone might just knocking into it while we are posing for a shot. However, we still manage to take group photos, by asking other visitors or the helpful staffs would volunteer their service when they happen to be nearby. We spent 2 hours in there and had a lot of fun taking photos of different poses with the art pieces. A tip from me: be careful when getting on and off the art pieces, the edges are getting quite rough.

Sydney Explorer Bus

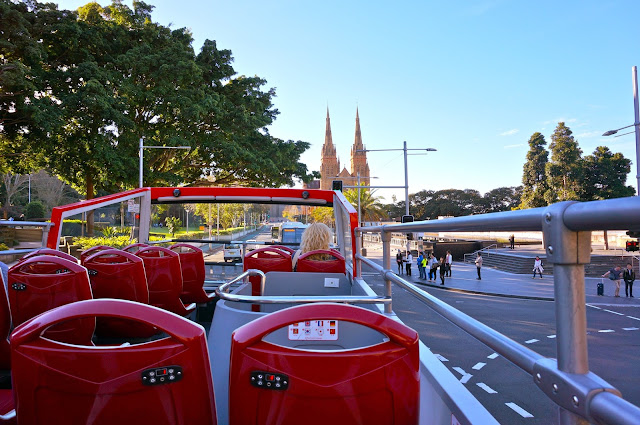
The entire loop takes 90 minutes as stated on the their website and it cost AUD 40 for a 24 hours hop-on-hop-off adult ticket. KB's friend suggested we take this on the first day to be familiar with the city and so we did because this is our first trip to Sydney. Otherwise, I don't think it's worth using this bus to get around. It's chilly sitting on the upper deck for too long during winter. Ideally, we should be hopping off to see some of the attractions along the way, but we were running late and I wanted to get to the Sydney Tower Eye just before sunset. We had to go to Sydney Tower Eye before going to any other attractions because of the combo pass. Maybe we should have avoided the rush and use our bus tickets the next day instead. I felt that we didn't make full use of the ticket.


View from the upper deck


Australian Museum


El Alamein Fountain


Woolloomooloo Bay


Sydney Opera House


The Central Station


Sydney Harbour Bridge

Sydney Swissotel

Swissotel Sydney is located beside the Sydney Tower Eye, below which is the Westfield shopping mall. From the airport, we took a train to St James station, exit at Elizabeth Street and head straight along Market Street until almost reaching George Street. It's really easy to get to even with the luggages. The hotel entrance is on the ground floor, but the hotel lobby is on the 8th.


It's kind of weird that they provide the whole set of bathing toiletries, but not toothbrush and toothpaste. By the way, there's no bathrobes and no slippers. The highest temperature that the air-condition can be set is 26 degree Celsius, which means, it only does cooling but not heating. For me, who is particularly afraid of cold, I would just have a take a really hot shower and hide under the blanket.

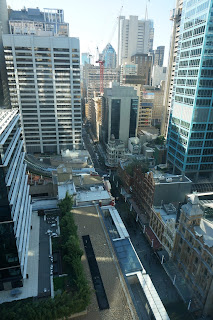
And now, for some city-view from our room:


Photomicrographs of Acid Crystals

This is probably the most interesting part of my job. It's also the first time I tried to produce such photographs. Before I start on the photomicrography project (with another colleague), I did my research and found some interesting works that had already been done: Alcoholic Cocktails under the Microscope and the Colourful World of Chemical Crystals. I took a few carboxylic acids that were already in our lab inventory and put them under our new Nikon Ci-L microscope.


Left: microscopic image of the crystals without polarized light (dark field)
Right: microscopic image of the crystals with polarized light

The pictures above are produced when I sandwich the crystals between the glass slide and the cover. However, Microscopy UK shared that their slides were prepared by melting the crystals (sandwiched between the slide and cover) using an alcohol lamp. I wasn't confident in using the lamp, so I used the hot plate instead. When the crystals melt, the slides are removed from the hot plate and it will quickly re-crystalize into a thin film. Interestingly, the images from the slides I've prepared are very different from those in their website, likely because of the environmental factors influencing the formation of the crystals as they cool.


Left to right: salicylic acid, tartaric acid, sorbic acid

These are how the thin crystal layers look under a polarized light microscope. Aren't they pretty?

Jurong Eco-Garden

The newly opened Jurong Eco-Garden was featured in the news last week and in the papers again today. It's not difficult for us to find the place, since KB and I are familiar with NTU. CleanTech Park is located just before NTU if you enter from Nanyang Avenue. Immediately after turning into Clean Tech View, CleanTech One is the building on the right and CleanTech Two is on the left.


The maps are not quite up to date because this place still very new.


One of the information boards shows the key features of the eco-garden.


To the west of CleanTech One, follow the pathway to the Summit Lookout.


Here's the view from the lookout.


In the foreground is the bicycle shelter and the yellow-green building in the background is CleanTech One.


The entrance to Thow Kwang Industry is near Ficus Lookout. Although public parking is available in this area, the number of lots are quite limited.


There are signs to alert visitors of photogenic spots and one of them is between the Ficus Lookout and the Fitness Corner. At this spot, the blocks of HDB flats are captured in the background, while the Green Roof Toilet (white building) can be seen on the right of the pond.


This area is on the right of the toilet. Shortly after I took this picture, a photographer and his model were at the bottom of the steps, near the pond, for photo-shoot.


Not only is the Swamp Pavilion a shelter and resting area, it is also a bridge to cross the elongated swamp (which looks more like a pond to me).


Spinach Extracts and Chromatography

This is what happened during my Introductory Chemistry laboratory lesson today: Thin Layer Chromatography (TLC) of Spinach Extracts. I've taught this twice in the past years and today, I decided to document it.

How to extract pigments from spinach leaves:


Step 1 - Buy some Chinese spinach from the market (or steal a few leaves from your mum's kitchen). Tear the leaves into small pieces and place them in a mortar. Add a few millilitres of acetone and grind them up. Keep grinding and adding acetone until a dark green liquid extract is obtained.


Step 2 - Use a dropper to draw the dark green extract and collect them in a test tube. Add more acetone and grind to produce more extracts, until the test tube is about half filled. Add 2 ml of hexane (3rd picture from the left), cap the test tube and invert it a few times. Allow the mixture to stand and it will separate to two layers (rightmost picture). The water extracted from the leaves will settle below, leaving the dark green hexane extract on top. If a lot of fine pieces of solid leaves were also transferred into the test tube, they will suspend in the hexane layer, and only a very thin layer of dark green extract can be seen.

How to separate the pigments on thin layer chromatography:


Unfortunately, this experiment doesn't work on paper chromatography, it has to be done on silica gel (supported either on aluminium foil or glass). Draw a line, using a pencil, about 0.5 cm from the bottom of the silica gel plate. Use a capillary tube to spot the dark green extract in the middle of the pencil line. Place the plate into a beaker, which contains about 2 ml of 30% acetone / hexane solution. Cover the beaker with a watch-glass and allow the TLC to develop. Do not move the beaker. When the solvent is almost reaching the top of the plate, remove it from the beaker and immediately draw the solvent front with a pencil. The topmost yellow pigment that is really close to the solvent front is beta-carotene. The bright green one that is somewhere in the middle of the plate is chlorophyll a, while the dull green one that is slight below is chlorophyll b.


An extension of this experiment would be to perform a separation on a column chromatography. The following is the adapted mini version of a column chromatography. A glass Pasteur pipette is clamped on a retort stand, at a height such that a glass vial can be placed just below it. Place a small cotton ball into the pipette from the top and use a stick to push it in until it reaches the narrowing part. Fill the pipette with silica gel suspended in hexane. Condition the column using 30% acetone / hexane solution, allowing the solvent to drip from the bottom of the pipette. Do not let the silica gel run dry at any point. When the solvent level reach the top of the silica gel, add about 2 drops of the dark green hexane extract on the top of the silica gel. Quickly add 30% acetone / hexane and continue adding until all the pigments are separated.


The separated pigments are collected in small vials. From left to right: faint yellow being beta-carotene, green chlorophylls, yellow solution containing other pigments.